指掛けの位置 Finger Lift Position
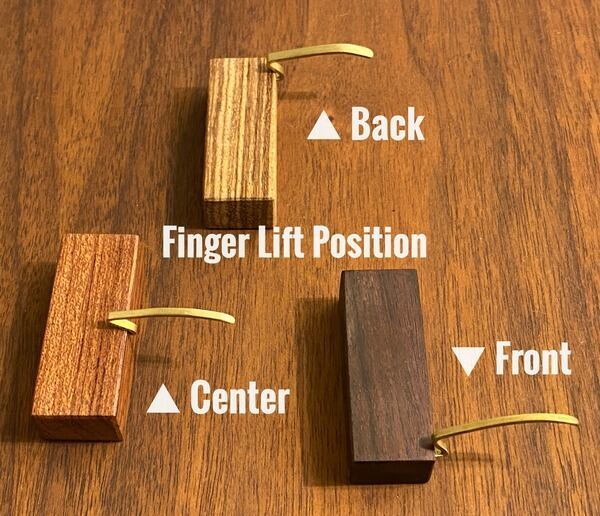
前方が幅2mm、中、後方が3mmになります。お好きな位置を指定してください。
後方に慣れていない方も多いと思いますが最初のうちは摘んで操作すれば安定しますし、時期慣れますので安心して下さい。音への影響ですがスタイラスから離れた位置ですが微かな違いな為、気になる方は後方を進めます。
The front will be 2 mm wide and the middle and rear will be 3 mm wide. Please specify your favorite position.
Many people are not accustomed to the backward position, but if you pick it up at first, it will be stable and you will get used to it. The effect on the sound is slight, but the difference is slight, so if you are concerned about the sound, please choose the backward position.
滑り止めパッド Non-slip pad
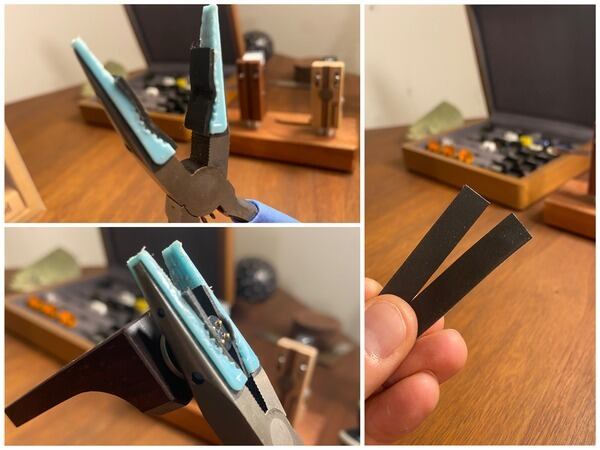
・水平調整時の保護ペンチが滑りましたら、
滑り止めパッドをお使い下さい。
・If the protective pliers slip during leveling,
please use the non-slip pad.
リード線の取り付け方 How to install lead wires
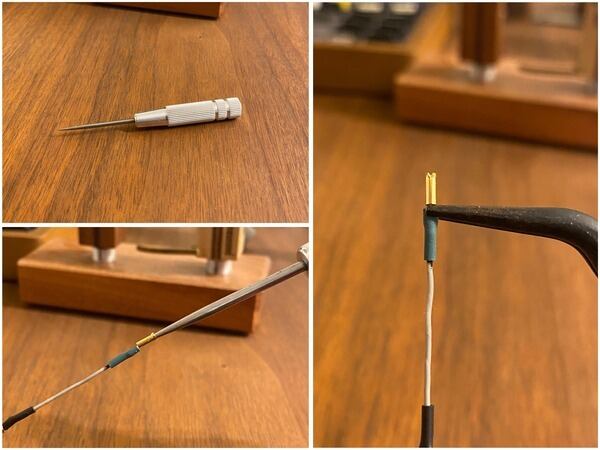
<取り付け前の準備>
・千枚通し(左上)
・チップ穴に千枚通しでほんの少し広げる。(左下
・リード線チップを精密ペンチで掴む位置。
(右)
<Preparation before installation>
・Threader (upper left)
・Spread the tip hole slightly with a chipotle. (Bottom left)
・Position to grip the lead wire tip with
precision pliers.(Right)
リード線取り扱い時にシェルチップの破損及びリード線が切れる傾向が報告されています。
専用道具を準備頂き取り付けを行ってください。
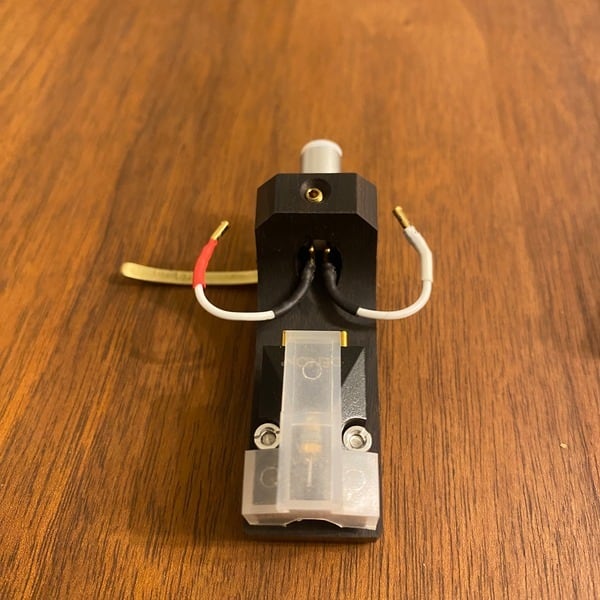
赤 R+(送り線Hot)/白 L+(送り線Hot)取り付け、写真のように円を描く形で取り付けて下さい。差し込む際にピンに対して垂直に入れて下さい。
・ラジオペンチベントタイプ
・千枚通し
発送前にリード線シェルチップを千枚通しで少しだけ広げてあります。ピンに垂直に回しながらゆっくり押し込んで下さい。シェルチップをベンド精密ペンチで掴む位置に気を付けてください。リード線黒側をヘッドシェル側に差し込む、写真の様にリード線を円を描くようにカートリッジ側に差し込んでください。
It has been reported that shell tips tend to break and lead wires tend to break when handling lead wires.
Please prepare special tools for installation.
Red R+ (feed wire hot) / White L+ (feed wire hot), install in a circular motion as shown in the photo. When inserting, insert perpendicularly to the pin.
Radio pliers vent type
Bent type
Before shipping, the lead wire shell tip has been slightly spread out with a stapler. Please push it in slowly while turning it perpendicular to the pin. Be careful where you grab the shell tip with the bend precision pliers. Insert the black side of the lead wire into the head shell side. Insert the lead wire into the cartridge side in a circular motion as shown in the picture.

左上:緑 R−(帰り線Cold)
右上:青 L−(帰り線Cold)
上の写真同様に進めてください。
Upper left: Green R- (return line Cold)
Upper right: blue L- (return line Cold)
Proceed in the same manner as above.
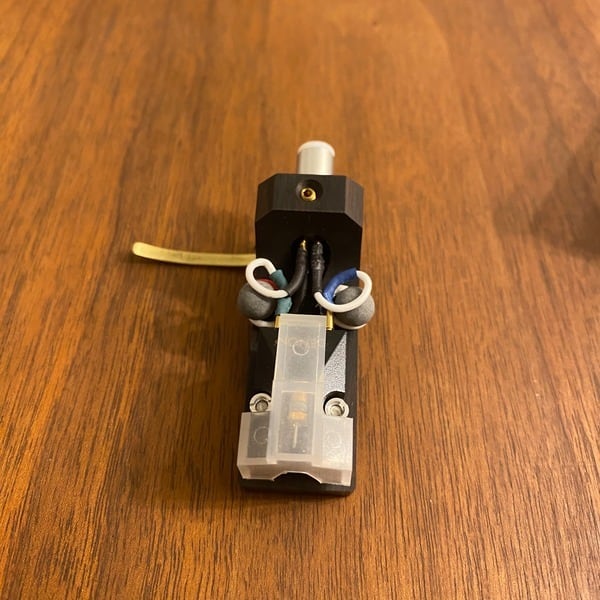
仕上がりはこのような形になります。慣れている人は、問題ないですが、慣れていない人は慎重にお願いします。
(丸いボールはトルマリンボールです。熱が加わるとマイナスイオンが発生し瞑想電流を抑えます。)購入なされた方に付属いたします。
The finished product will look like this. If you are familiar with it, there is no problem, but if you are not familiar with it, please be careful.
(The round balls are tourmaline balls. When heated, they generate negative ions and suppress the meditative current.) The tourmaline ball will be included with your purchase.
